To Cloud or not to Cloud?
For a lot of geeks, this is a question that is preying on their minds. I am one of those geeks.
I'm fairly well integrated into the Cloud already; my fate was cemented when I bought a Google Phone. "What? You mean I can access all my mail and contacts and stuff from my phone and if I change it on my phone it will change my Google Contacts too? And my calendar and everything? I'M IN!" There are obvious benefits to having your phone info synced with the Cloud, like, never EVER again having to spend an entire evening alone with a bottle of wine and a DVD, manually inputting every single one of your contacts on your new phone...But if we take another step further, beyond phone contacts, calendars, etc., we start looking at things like personal documents, photos, videos and (potentially) application settings like for Firefox.
There are already choices out there to use...Google Docs was one of the first I heard about, Ubuntu One is a new Ubuntu service that is now standard with the latest release, and only just today, Dropbox was featured on Dork Adore (one of my favourite geek-centric blogs).
So it's easy to get into Cloud computing if you're of a mind to, but I still can't help feeling a bit uneasy about the whole thing. I don't know if it's my general mistrust of large organisations (I still feel a little niggly that Google has all my personal details in a file, regardless of what their privacy policy is), or whether it's influence from old Libertarian friends or my ex-military parents. I'm just not sure whether I would feel comfortable leaving someone else in charge of my documents.
Of course, there are a few big advantages to holding more information in the Cloud. For instance, I'm willing to bet that Google has a much more regimented and regular backing-up process than I have! And given that you could put almost all of your files now into a Cloud folder, it makes it easier to run small, lightweight computers like netbooks, because the only files you'd have to keep actually ON your computer would be your system files.
For me, at the moment, I'm undecided. I suspect, with all things, when it becomes a practical necessity to share more of my files with other computers, I will probably give it a go. But for now, I'll give it a miss, and just stick to syncing my contacts and calendar.
Monday 28 December 2009
Monday 21 December 2009
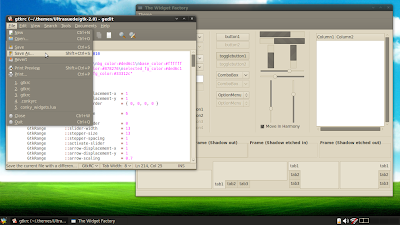
GTK Theming Isn't Really That Hard. Honest!
So, I've been away for awhile...
Been rebuilding a machine, getting fed up, buying a new computer, setting that up, and generally being ADHD with all my little projects...
Anyway, I've started working on GTK themes, and as it turns out, it's not as difficult as it seems at first. I've released two GTK themes recently on my DeviantArt account...Have a look!
Ultrasuede is the first of the two themes, named after the sofa I sit on to do most of my work! I'm not entirely sure why I started with this one, after all, it's no secret that it's difficult to write dark GTK themes, and as it turns out, it's even harder when you want only parts of the theme to be dark (in this case, the menubar/menus and toolbar). I still consider this one a work-in-progress, but I still love it for its softness of colour and general readability. Plus, it's got lovely blue tooltips!
Venus is my latest theme, and the one I'm currently using. I originally started it because I wanted to write a grey/silver theme, but the ones I find tend to be either too simple or too shiny. I don't like my widgets to be glassy; I prefer a more soft, smooth lighting effect. So I started with the colour scheme from elementary (one of my favourite packages, although like I said, I find the widgets too shiny) and went from there...Changing the accent colour from blue to green, and added soft yellow tooltips. Very soothing, I think!
But anyway, the point of this post was not to toot my own horn ("Too late!" I hear you cry...), it was to explain how I started in GTK theming, and point out some tips to get you started doing it for yourself.
First things first: Step 1 is to grab some GTK themes that you like. Some of my favourites are:
Now, close your eyes, hold your breath, and jump in.
Start by copying one of your themes into ~/.themes/ and changing the folder to something you can remember. I tend to use ~/.themes/Untitled for new themes I'm working on. The file structure of a GTK theme looks like:
It's the gtkrc that we want to edit. It's a simple text file with a relatively simple layout.
First, you may define a colour scheme (this is what turns up in the Colors tab of the Customize... dialog in Gnome Appearance Preferences). It will look something like this:
After you've defined all your styles, then comes widget matching. It's how the theme applies your styles to all the various widgets that might pop up in GTK-based programs. There are three types of matching:
And that's it...For the basics, that is! To get started making your own theme, I would start by tweaking with someone else's, so you get a feel for what changes what. Then if you get really brave, you can start from scratch (which after a few goes, I actually found was easiest!).
The hardest parts of GTK theming are the widget matching, understanding how the widgets are arranged in a hierarchy and understanding how their styles get inherited. I can't say I'm an expert, but that's where step 1 comes in! The best way to learn is a combination of looking at other people's themes and reading the GTK documentation. The latter is particularly useful because the widget hierarchy pages have listings of what style-properties you can specify in your styles.
I hope this gives some of you out there the courage to go ahead and try it...As with all things open-source, the more of us out there doing it, the easier it makes it for all of us!
Been rebuilding a machine, getting fed up, buying a new computer, setting that up, and generally being ADHD with all my little projects...
Anyway, I've started working on GTK themes, and as it turns out, it's not as difficult as it seems at first. I've released two GTK themes recently on my DeviantArt account...Have a look!
 |
| From Screenshots |
 |
| From Screenshots |
But anyway, the point of this post was not to toot my own horn ("Too late!" I hear you cry...), it was to explain how I started in GTK theming, and point out some tips to get you started doing it for yourself.
First things first: Step 1 is to grab some GTK themes that you like. Some of my favourites are:
- Elementary GTK (eGTK)
- Espresso
- Human (any of the various versions that come packaged with Ubuntu)
- Dyne Dark (comes pre-installed with Crunchbang Linux)
Now, close your eyes, hold your breath, and jump in.
Start by copying one of your themes into ~/.themes/ and changing the folder to something you can remember. I tend to use ~/.themes/Untitled for new themes I'm working on. The file structure of a GTK theme looks like:
~/
+-- .themes/
    +-- Untitled/
        +-- gtk-2.0/
            +-- gtkrc
If it's a theme like Human, you may also find folders for Metacity, an index.theme (for icons) and others inside the Untitled/ folder.It's the gtkrc that we want to edit. It's a simple text file with a relatively simple layout.
First, you may define a colour scheme (this is what turns up in the Colors tab of the Customize... dialog in Gnome Appearance Preferences). It will look something like this:
gtk_color_scheme = "base_color:#F7F9FA\nfg_color:#4D4D4D\ntooltip_fg_color:#000000\nselected_bg_color:#a5b26b\nselected_fg_color:#ffffff\ntext_color:#4D4D4D\nbg_color:#D6D6D6\ntooltip_bg_color:#f2f29d"Next, you should have a listing of styles, in the format
style "name"
{
    Various style properties
}
Start with a "default" style, which will be applied to all widgets, and then on to more specific styles that will apply to only certain widgets. The default style can contain as much as little as you like, but typically you will find:- Some specific widget style properties, of the format GtkWidget::style-property = value
- Thickness parameters, which define the padding of the objects inside widgets, and look line xthickness = value and ythickness = value
- Colour definitions, of which there should be 20: foreground (fg), background (bg), background of entry fields (base) and text (text), and five states for each (normal, prelight, active, selected and insensitive)
- Default settings for the engine (if any) you choose to use
style "default"
{
 GtkButton ::child-displacement-x  = 1
 GtkButton ::child-displacement-y  = 1
 GtkButton ::default-border  = { 0, 0, 0, 0 }

 GtkPaned ::handle-size   = 6

 GtkRange ::trough-border   = 0
 GtkRange ::slider-width   = 13
 GtkRange ::stepper-size   = 13
 GtkRange ::stepper-spacing  = 1
 GtkRange ::activate-slider  = 1
 GtkRange ::arrow-displacement-x  = 1
 GtkRange ::arrow-displacement-y  = 1
 GtkRange ::arrow-scaling   = 0.7

  GtkScale ::slider-width  = 13 # Needs to be ODD in order to center evenly
  GtkScale ::slider-length  = 13
  GtkScale ::trough-side-details = 1 # 0 = empty slider, 1 = filled
  GtkScale ::trough-border  = 1

  GtkScrollbar ::min-slider-length = 42

 GtkScrolledWindow ::scrollbar-spacing = 3

 GtkNotebook ::tab-curvature   = 1
 GtkNotebook ::tab-overlap   = 1

 GtkMenuBar ::internal-padding  = 0

 GtkExpander ::expander-size   = 14

 GtkToolbar ::internal-padding  = 0
 GtkToolButton ::icon-spacing   = 3

 GtkTreeView ::expander-size   = 14
 GtkTreeView ::vertical-separator  = 0

 GtkMenu  ::horizontal-padding  = 0
 GtkMenu  ::vertical-padding  = 0

 xthickness = 1
 ythickness = 1

 fg[NORMAL]        = @fg_color
 fg[PRELIGHT]      = @fg_color
 fg[SELECTED]      = @selected_fg_color
 fg[ACTIVE]        = @fg_color
 fg[INSENSITIVE]   = shade (0.7, @bg_color)

 bg[NORMAL]        = @bg_color
 bg[PRELIGHT]      = shade (1.05, @bg_color)
 bg[SELECTED]   = @selected_bg_color
 bg[INSENSITIVE]   = @bg_color
 bg[ACTIVE]        = shade (0.95, @bg_color)

 base[NORMAL]      = @base_color
 base[PRELIGHT]    = shade (0.95, @bg_color)
 base[ACTIVE]      = shade (0.7, @bg_color) # Unfocused selected text background
 base[SELECTED]    = @selected_bg_color
 base[INSENSITIVE] = @bg_color

 text[NORMAL]      = @text_color
 text[PRELIGHT]    = @text_color
 text[ACTIVE]      = @selected_fg_color
 text[SELECTED]    = @selected_fg_color
 text[INSENSITIVE] = shade (0.7, @bg_color)

 engine "murrine"
 {
  animation  = TRUE # FALSE = disabled, TRUE = enabled
  colorize_scrollbar = TRUE # FALSE = disabled, TRUE = enabled
  scrollbar_color  = @selected_bg_color
  contrast  = 0.8 # 0.8 for less contrast, more than 1.0 for more contrast on borders
  glazestyle  = 0  # 0 = flat highlight, 1 = curved highlight, 2 = concave style, 3 = top curved highlight, 4 = beryl highlight
  gradient_shades  = {1.05,1.02,1.02,1.0} # default: {1.1,1.0,1.0,1.1}
  gradients  = TRUE # FALSE = disabled, TRUE = enabled
  highlight_shade  = 1.0 # set highlight amount for buttons or widgets
  lightborder_shade = 1.0 # sets lightborder amount for buttons or widgets
  lightborderstyle = 0   # 0 = lightborder on top side, 1 = lightborder on all sides
  listviewheaderstyle = 1   # 0 = flat, 1 = glassy, 2 = raised
  listviewstyle  = 1   # 0 = nothing, 1 = dotted
  menubaritemstyle = 1   # 0 = menuitem look, 1 = button look
  menubarstyle  = 0   # 0 = flat, 1 = glassy, 2 = gradient, 3 = striped
  menuitemstyle  = 1  # 0 = flat, 1 = glassy, 2 = striped
  menustyle  = 0   # 0 = no vertical menu stripe, 1 = display vertical menu stripe
  reliefstyle  = 1   # 0 = flat, 1 = inset, 2 = shadow
  rgba   = FALSE # FALSE = disabled, TRUE = enabled
  roundness  = 3  # 0 = squared, 1 = old default, more will increase roundness
  scrollbarstyle  = 0     # 0 = nothing, 1 = circles, 2 = handles, 3 = diagonal stripes, 4 = diagonal stripes and handles, 5 = horizontal stripes, 6 = horizontal stripes and handles
  sliderstyle  = 0  # 0 = nothing added, 1 = handles
  stepperstyle  = 1  # 0 = standard, 1 = integrated stepper handles, 2 = unknown
  toolbarstyle  = 2  # 0 = flat, 1 = glassy, 2 = gradient
 }
}
Since you will apply the default style to all widgets and then pick out individual widgets to change after that, the other styles you define will typically only be a couple of lines long, which will override the corresponding lines from the default style.After you've defined all your styles, then comes widget matching. It's how the theme applies your styles to all the various widgets that might pop up in GTK-based programs. There are three types of matching:
- Class
- Widget class
- Widget
class "GtkWidget" style "default"
widget_class "*GtkCombo*" style "wider"
widget "*.gtk-combobox-popup-menu.*" style "combobox-popup"
Here, all widgets first have the default theme applied. Then anything whose widget class contains GtkCombo (note the * wild card) has the "wider" style applied. Finally, the very specific case of a widget with .gtk-combobox-popup-menu. will have "combobox-popup" applied. (Please note there is some trickiness here to do with the wild card * -- you can also use $ for a single-character wild card -- and the best place to learn to navigate it is to use trial and error.)
And that's it...For the basics, that is! To get started making your own theme, I would start by tweaking with someone else's, so you get a feel for what changes what. Then if you get really brave, you can start from scratch (which after a few goes, I actually found was easiest!).
The hardest parts of GTK theming are the widget matching, understanding how the widgets are arranged in a hierarchy and understanding how their styles get inherited. I can't say I'm an expert, but that's where step 1 comes in! The best way to learn is a combination of looking at other people's themes and reading the GTK documentation. The latter is particularly useful because the widget hierarchy pages have listings of what style-properties you can specify in your styles.
I hope this gives some of you out there the courage to go ahead and try it...As with all things open-source, the more of us out there doing it, the easier it makes it for all of us!
Saturday 14 November 2009
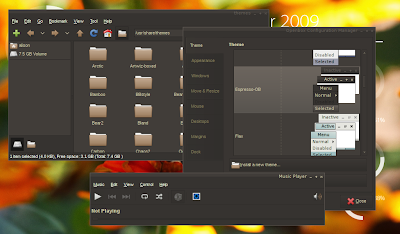
Desktop Customisation: A Double-Edged Sword
I can safely say that I am a desktop customisation addict.
The problem is, I'm not entirely sure that it's because I actually enjoy it, or whether it's because I am completely OCD and just perpetually in pursuit of pixel-perfection.
It's fair to say that one of the things I love most about working with Linux (and the open-source community in general) is the extent to which you can customise everything to your liking. And I do mean EVERYTHING. (I think my favourite obscure thing to customise has got to be the spacing between the menu and submenus in Openbox...Awesome!) HOWEVER, if you're a little perfectionistic like yours truly, it can also be the bane of your existence, because after a while, you start to notice every pixel out of place. Or how many times have you downloaded a new GTK theme, only to find that, for instance, the Google search box on your Firefox toolbar ends up being the wrong colour for some unknown reason?
The sad fact of it is that because Linux distributions are largely written and edited by the Linux community, many of whom do their coding in their spare time in front of the telly, there is rarely the attention to detail in GUI design as there is in a commercial OS like Mac OS or Windows. I hate to admit it, but while those desktop environments only give you a few choices of looks, overall, those choices are much cleaner and more complete. Linux distros tend to be easier to customise (in fact, they usually encourage it by installing several default themes), but the overall impact is weaker because they tend to be standalone themes, rather than part of a whole desktop "look". Add to this the awkwardness of GTK vs. Qt, incompatibilities with Firefox, quirks of various panels and window managers and, well, you can get a bit of a mess. So really, desktop customisation is a bit of a double-edged sword: whilst you can tweak your GUI to your heart's content, more often than not, I find that each tweak uncovers something else needing to be tweaked, and it quickly becomes a downward spiral...
Thursday 5 November 2009
Memory usage with imlib2 for Lua
I recently started working with imlib2 bindings for Lua as part of the work I'm doing with learning the whole Cairo thing...Please see my latest post over on the Conky Blog.
However, I ran into an interesting problem when I was writing that script, not having written anything with imlib2 bindings before! As I was testing my photo album script, I found that I had a memory leak...The longer I left my script to run, the more and more my memory usage would ramp up until it topped out and I found I couldn't display any more photos. Eep! Not really what you want from a photo album.
So I thought I'd share with you a little bit about how imlib2 draws pictures, as opposed to the way Cairo does it, because having had a bit of experience with Cairo actually led me to think about image drawing in a way that made it difficult to work with imlib2, because the two are so different.
First of all, why use imlib2 at all when you can, to some extent, use Cairo to draw pictures? Well, the reason I turned my hand to it was because I wanted to be able to render .jpg images in my Conky, and the Cairo bindings we use can only interpret .png at the moment, through cairo_image_surface_create_from_png(...). By contrast, if you load an image using imlib2, it auto-detects the type and scans its own internal libraries to find a suitable decoder. So imlib2 has a much broader range of image type support, with no fiddling.
If you want to manipulate existing images in imlib2, first you need to load the image into memory with imlib_load_image(...). Eventually, if you want to then draw that image onto the Conky window, you'll use the imlib_render_image_on_drawable(...) function. However, if you want to manipulate that image first, you will need to do all your manipulation on a "buffer" image before you render it onto the surface.
Now, I'm not very good (yet!) at working with transformations in Cairo, so I'm used to thinking of things like a plotter...Move to (a, b), draw a line to (x, y) and stroke. So when I want to draw an image to a window, what I really want to do is load an image, select the rectangle to draw it into, and then "fill" it in...But that's not really the way to do it with imlib2. My example will be my photo album script...Essentially, I wanted to load an image and draw it onto the Conky window at a set (smaller) size. However, I found that if I just load the image and then draw the image at a smaller size using the following:
(For those of you who are wondering, the lines above shrink the image from w_img x h_img down to a specified width x height, then draw it on the Conky window at the coordinates in the second line...)
What you need to do to avoid the memory leak is to very carefully manage your memory usage by freeing your images after you're done with them. The good way, then, to draw my reduced images onto the Conky window is to use the following method:
For more information on the functions available to you in imlib2, check out their documentation.
In the meantime, here, have a screenie :)
You can also grab the script that made it, from the Conky Blog, or my DevArt account.
However, I ran into an interesting problem when I was writing that script, not having written anything with imlib2 bindings before! As I was testing my photo album script, I found that I had a memory leak...The longer I left my script to run, the more and more my memory usage would ramp up until it topped out and I found I couldn't display any more photos. Eep! Not really what you want from a photo album.
So I thought I'd share with you a little bit about how imlib2 draws pictures, as opposed to the way Cairo does it, because having had a bit of experience with Cairo actually led me to think about image drawing in a way that made it difficult to work with imlib2, because the two are so different.
First of all, why use imlib2 at all when you can, to some extent, use Cairo to draw pictures? Well, the reason I turned my hand to it was because I wanted to be able to render .jpg images in my Conky, and the Cairo bindings we use can only interpret .png at the moment, through cairo_image_surface_create_from_png(...). By contrast, if you load an image using imlib2, it auto-detects the type and scans its own internal libraries to find a suitable decoder. So imlib2 has a much broader range of image type support, with no fiddling.
If you want to manipulate existing images in imlib2, first you need to load the image into memory with imlib_load_image(...). Eventually, if you want to then draw that image onto the Conky window, you'll use the imlib_render_image_on_drawable(...) function. However, if you want to manipulate that image first, you will need to do all your manipulation on a "buffer" image before you render it onto the surface.
Now, I'm not very good (yet!) at working with transformations in Cairo, so I'm used to thinking of things like a plotter...Move to (a, b), draw a line to (x, y) and stroke. So when I want to draw an image to a window, what I really want to do is load an image, select the rectangle to draw it into, and then "fill" it in...But that's not really the way to do it with imlib2. My example will be my photo album script...Essentially, I wanted to load an image and draw it onto the Conky window at a set (smaller) size. However, I found that if I just load the image and then draw the image at a smaller size using the following:
imlib_blend_image_onto_image(image, 0, 0, 0, w_img, h_img, 0, 0, width, height)I wound up with a horrific memory leak...Basically, I was loading the images into memory and LEAVING THEM THERE. AT FULL SIZE. Ouch.
imlib_render_image_on_drawable(xc - width/2, yc - height/2)
(For those of you who are wondering, the lines above shrink the image from w_img x h_img down to a specified width x height, then draw it on the Conky window at the coordinates in the second line...)
What you need to do to avoid the memory leak is to very carefully manage your memory usage by freeing your images after you're done with them. The good way, then, to draw my reduced images onto the Conky window is to use the following method:
image = imlib_load_image(album_dir .. filename)This code does the following:
if image == nil then return end
imlib_context_set_image(image)
w_img, h_img = imlib_image_get_width(), imlib_image_get_height()
buffer = imlib_create_image(width, height)
imlib_context_set_image(buffer)
imlib_blend_image_onto_image(image, 0, 0, 0, w_img, h_img, 0, 0, width, height)
imlib_context_set_image(image)
imlib_free_image()
imlib_context_set_image(buffer)
imlib_render_image_on_drawable(xc - width/2, yc - height/2)
imlib_free_image()
- loads the given image into memory, in a variable called "image"
- checks to see if the image has loaded successfully; if not, breaks out of the function
- sets the imlib2 context to be "image"
- grabs the dimensions of the loaded image
- creates a "buffer" image
- sets the context to be "buffer", so we can blend onto it
- draws a scaled-down version of the image onto "buffer"
- sets the context back to "image", so we can release it
- releases the original loaded image, so we are then just left with the scaled down version, still held in memory
- sets the context back to "buffer", so we can draw what's on it onto the drawable window
- draws whatever's in "buffer" onto the Conky window
- releases the buffer image
For more information on the functions available to you in imlib2, check out their documentation.
In the meantime, here, have a screenie :)
 |
| From Screenshots |
Thursday 29 October 2009
Slowly moving to DeviantArt
Well, after searching long and hard for somewhere that would host all of my scripts, etc., I have finally settled on DeviantArt. I have moved away from gnome-look.org because (a) I don't actually use Gnome anymore, so it seems a little silly to ringfence myself in that way, (b) gnome-look.org doesn't allow me to upload full-size screenies, which means I have to resize everything before uploading (read: what a pain!) and (c) ooooh, aren't the colours on the DevArt website purty?
So anyway, you can see my new profile here, and as a tasty taster, here's a screenie of my first upload, an Openbox theme for use with Espresso GTK theme, by SpecKtacle, over on gnome-look.org.
Enjoy!
So anyway, you can see my new profile here, and as a tasty taster, here's a screenie of my first upload, an Openbox theme for use with Espresso GTK theme, by SpecKtacle, over on gnome-look.org.
Enjoy!
 |
| From My Little Desktop Photos |
Monday 26 October 2009
Argh. My first snag with my lovely Lua/Cairo!
So I've been working on making a lovely little eye-candy calendar widget to display with my Conky Widgets script, but I ran into a snag...Here's the best version I got before giving up (for now!):
Can you spot the annoyingness yet?
The text is misaligned!
As it turns out, Cairo draws text from an anchor point roughly at the lower left corner of the text being displayed. In this code, the month name/year, days of the week and day numbers are all evenly spaced on a square grid, but they look uneven because they are anchored at that lower-left position.
What I really want is for each element to be centered in a block. So the month/year is centered in a block that spans the top of the widget, and each of the day numbers is centered in a small square, like on a printed calendar.
However, in Cairo, you can't change where a text element is anchored, but you CAN use a function called cairo_text_extents() to give you some size information about the text block you want to manipulate, and then move to an appropriate start point. (See the Cairo tutorial for a more detailed explanation.)
I must have spent hours trying to get this function to work before I finally gave in and asked the Conky devs...and got this response: "tolua++ doesn't export any creation functions (or constructors) for C structures, only C++ classes." Basically, the third argument in the cairo_text_extents() function is of the structure cairo_text_extents_t, which isn't recognised by Lua.
All this roughly translated: as it stands now, we can't do any sophisticated text manipulation using Cairo in Lua. Booooo.
So the calendar is going to one side for the time being. Incidentally, if you would like to grab the Lua code for this widget, here you go.
 |
| From My Little Desktop Photos |
The text is misaligned!
As it turns out, Cairo draws text from an anchor point roughly at the lower left corner of the text being displayed. In this code, the month name/year, days of the week and day numbers are all evenly spaced on a square grid, but they look uneven because they are anchored at that lower-left position.
What I really want is for each element to be centered in a block. So the month/year is centered in a block that spans the top of the widget, and each of the day numbers is centered in a small square, like on a printed calendar.
However, in Cairo, you can't change where a text element is anchored, but you CAN use a function called cairo_text_extents() to give you some size information about the text block you want to manipulate, and then move to an appropriate start point. (See the Cairo tutorial for a more detailed explanation.)
I must have spent hours trying to get this function to work before I finally gave in and asked the Conky devs...and got this response: "tolua++ doesn't export any creation functions (or constructors) for C structures, only C++ classes." Basically, the third argument in the cairo_text_extents() function is of the structure cairo_text_extents_t, which isn't recognised by Lua.
All this roughly translated: as it stands now, we can't do any sophisticated text manipulation using Cairo in Lua. Booooo.
So the calendar is going to one side for the time being. Incidentally, if you would like to grab the Lua code for this widget, here you go.
Saturday 17 October 2009
Finally! CPU temps in Conky on the Acer Aspire One!
OMIGOD YOU GUYS!!!
I gave up on getting CPU temps in Conky (on my Acer Aspire One netbook) ages ago. Something to do with hardware incompatibility with lm-sensors, or acpi or something...Anyway, I never figured it out.
But after trawling through the Crunchbang forums in search of why I couldn't manage to compile the acerhdf module...I discovered how to find my CPU temp! Once I got acerhdf to compile (it turns out that I hadn't installed the headers for my Linux kernel, so the make was crashing out), I followed the instructions on this post to display the current CPU temp.
All you have to do is type
To use this in Conky, just use
Happy Conkying!
I gave up on getting CPU temps in Conky (on my Acer Aspire One netbook) ages ago. Something to do with hardware incompatibility with lm-sensors, or acpi or something...Anyway, I never figured it out.
But after trawling through the Crunchbang forums in search of why I couldn't manage to compile the acerhdf module...I discovered how to find my CPU temp! Once I got acerhdf to compile (it turns out that I hadn't installed the headers for my Linux kernel, so the make was crashing out), I followed the instructions on this post to display the current CPU temp.
All you have to do is type
cat /sys/class/thermal/thermal_zone0/tempin a terminal, and it outputs the CPU temp in degrees C.
To use this in Conky, just use
${exec cat /sys/class/thermal/thermal_zone0/temp}
Happy Conkying!
Thursday 15 October 2009
A quick explanation to the Conky packages in Ubuntu 9.10 Karmic Koala
Hi all...
If you currently use the Conky package from the Jaunty repos, you'll be on version 1.6.1. The latest release is now 1.7.2, and is available in the Karmic repos.
However, there are now four versions of Conky in the Karmic repos! I thought I'd give you a quick guide, so you know which one to use so you get the most out of your favourite desktop monitor.
First of all: why are there so many versions now? It does seem a little excessive! However, according to Cesare Tirabassi, the Ubuntu maintainer for Conky, "One package was really not adequate anymore to satisfy the needs of all conky users. Some users want to have as many features as possible enabled, others as little as possible, some others are happy with what is enabled by default upstream. I therefore changed the packaging for karmic: now we have 3 possible flavours of conky available." (Those three flavours are represented by four packages in the repos, one of which will eventually be deprecated.)
The four versions now available are:
From the package documentation, here is a brief explanation of the differences between the packages:
conky-cli:
It is highly advised that you upgrade to one of these packages as soon as you can, as the conky metapackage will eventually be removed.
If you currently use the Conky package from the Jaunty repos, you'll be on version 1.6.1. The latest release is now 1.7.2, and is available in the Karmic repos.
However, there are now four versions of Conky in the Karmic repos! I thought I'd give you a quick guide, so you know which one to use so you get the most out of your favourite desktop monitor.
First of all: why are there so many versions now? It does seem a little excessive! However, according to Cesare Tirabassi, the Ubuntu maintainer for Conky, "One package was really not adequate anymore to satisfy the needs of all conky users. Some users want to have as many features as possible enabled, others as little as possible, some others are happy with what is enabled by default upstream. I therefore changed the packaging for karmic: now we have 3 possible flavours of conky available." (Those three flavours are represented by four packages in the repos, one of which will eventually be deprecated.)
The four versions now available are:
- conky
- conky-all
- conky-cli
- conky-std
From the package documentation, here is a brief explanation of the differences between the packages:
conky-cli:
conky-cli is a basic package that can be useful in servers or piped with dzen2.conky-std:
It includes the following support:
MPD, MOC, math, apcupsd and I/O stats
conky-std should be a good compromise for most users that do not need special features.conky-all:
It includes the following support:
X11, XDamage, XDBE, Xft, MPD, MOC, math, hddtemp, portmon, wireless, ALSA mixer, apcupsd, I/O stats and lua
conky-all includes almost all of the available support:
X11, XDamage, XDBE, Xft, MPD, MOC, math, hddtemp, portmon, RSS, curl, Weather (METAR and XOAP), wireless, IBM, nvidia, eve-online, Imlib2, ALSA mixer, apcupsd, I/O stats, Lua and Lua bindings for the cairo and imlib2 libraries
It is highly advised that you upgrade to one of these packages as soon as you can, as the conky metapackage will eventually be removed.
Thursday 1 October 2009
If you haven't tried Lua/Cairo yet, you're missing out!
Wow. So, it's been a while, huh? Well, don't you worry, I've been busy. I started teaching myself Lua, so I could do some scripting with the new Cairo bindings.
I've done a little Getting Started Guide over at the Conky Blog, and I've done some scripts, which are posted over at Conky Hardcore. If you haven't tried it yet, I HIGHLY RECOMMEND IT!!! Here are some screenies to whet your appetite :)
...All done with Conky, and only Conky :)
I've done a little Getting Started Guide over at the Conky Blog, and I've done some scripts, which are posted over at Conky Hardcore. If you haven't tried it yet, I HIGHLY RECOMMEND IT!!! Here are some screenies to whet your appetite :)
 |
| From Screenshots |
 |
| From Screenshots |
 |
| From Screenshots |
 |
| From Screenshots |
Tuesday 22 September 2009
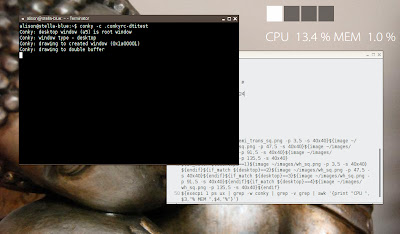
$image size vs. $image resizing, and a Simple Way to Make Conky Monitor Itself
Subbass recently made a comment on the Official Conky Blog that got me thinking: is it more efficient for Conky to resize an image in every iteration or for it to display an image "straight", without resizing it? Okay, seems like an obvious answer, but it raised the more interesting question: can you get Conky to display CPU and memory usage, but just for itself? It would be incredibly useful for us experimental types, to understand how we can make our Conkys more lightweight (given that the whole ethos of Conky to begin with is "a LIGHTWEIGHT system monitor").
With the help of dk75 and mobilediesel, I came up with the following, which uses ps to give the time-averaged CPU and memory usage of your Conky process(es):
The important thing to note is that because it uses ps, the output is time-averaged over the entire life of the process. This is different to top, which shows the information since the last iteration of top. (Check the relevant man pages for more information.) Both programs have their uses; in the case of comparing the relative efficiency of different .conkyrcs, I find the ps method the most suitable. Incidentally, if you want to use top instead, you can use:
The Test
I created three .conkyrc files, based on this one (my original config that was written for the Conky blog):
Versions 2 and 3 were, respectively, using a set of 40x40px images and no resizing, and using a set of 10x10px images with resizing.
I ran each Conky for 10 minutes on its own, and at the end of the 10 minutes, took a screenshot capturing the CPU and memory percents.
Version 1, 50x50px images, scaled down to 40x40px, CPU 13.4% and MEM 1.0%:
Version 2, 40x40px images, no resizing, CPU 9.3% and MEM 1.0%:
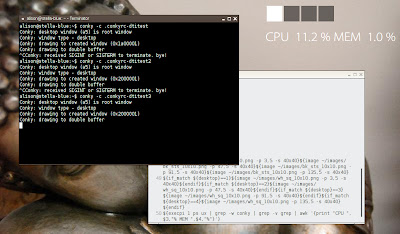
Version 3, 10x10px images, scaled up to 40x40px, CPU 11.2% and MEM 1.0%:
In summary, it is most efficient to use the correctly-sized images for your Conky. However, if you must scale your images, best to use smaller images and scale up, rather than bigger ones scaled down.
I should note, that the CPU and memory percentages are obviously dependent on my system, which is just a little netbook, so forgive me if they seem prohibitively high! Also, you can improve the performance of this particular Conky greatly by increasing the update_interval; I was using 0.1s because I wanted my desktop indicator to switch quickly upon desktop change. However, if you're happy with a bit of a lag, you can always change it to 0.5s or 1s.
With the help of dk75 and mobilediesel, I came up with the following, which uses ps to give the time-averaged CPU and memory usage of your Conky process(es):
${execpi 1 ps ux | grep -w conky | grep -v grep | awk '{print "CPU ",$3,"% MEM ",$4,"%"}'}
The important thing to note is that because it uses ps, the output is time-averaged over the entire life of the process. This is different to top, which shows the information since the last iteration of top. (Check the relevant man pages for more information.) Both programs have their uses; in the case of comparing the relative efficiency of different .conkyrcs, I find the ps method the most suitable. Incidentally, if you want to use top instead, you can use:
${execi 1 top -b -n1 -p $(pidof conky |awk '{gsub(" ", ",", $0); print}') |awk '/conky/ {print "CPU:",$9"%","MEM:",$10"%"}'}
The Test
I created three .conkyrc files, based on this one (my original config that was written for the Conky blog):
TEXT
${image ~/images/bk_semi_trans_sq.png -p 3,5 -s 40x40}${image ~/images/bk_semi_trans_sq.png -p 47,5 -s 40x40}${image ~/images/bk_semi_trans_sq.png -p 91,5 -s 40x40}${image ~/images/bk_semi_trans_sq.png -p 135,5 -s 40x40}
${if_match ${desktop}==1}${image ~/images/wh_sq.png -p 3,5 -s 40x40}${endif}${if_match ${desktop}==2}${image ~/images/wh_sq.png -p 47,5 -s 40x40}${endif}${if_match ${desktop}==3}${image ~/images/wh_sq.png -p 91,5 -s 40x40}${endif}${if_match ${desktop}==4}${image ~/images/wh_sq.png -p 135,5 -s 40x40}${endif}
${execpi 1 ps ux | grep -w conky | grep -v grep | awk '{print "CPU ",$3,"% MEM ",$4,"%"}'}
Versions 2 and 3 were, respectively, using a set of 40x40px images and no resizing, and using a set of 10x10px images with resizing.
I ran each Conky for 10 minutes on its own, and at the end of the 10 minutes, took a screenshot capturing the CPU and memory percents.
Version 1, 50x50px images, scaled down to 40x40px, CPU 13.4% and MEM 1.0%:
 |
| From My Little Desktop Photos |
Version 2, 40x40px images, no resizing, CPU 9.3% and MEM 1.0%:
 |
| From My Little Desktop Photos |
Version 3, 10x10px images, scaled up to 40x40px, CPU 11.2% and MEM 1.0%:
 |
| From My Little Desktop Photos |
In summary, it is most efficient to use the correctly-sized images for your Conky. However, if you must scale your images, best to use smaller images and scale up, rather than bigger ones scaled down.
I should note, that the CPU and memory percentages are obviously dependent on my system, which is just a little netbook, so forgive me if they seem prohibitively high! Also, you can improve the performance of this particular Conky greatly by increasing the update_interval; I was using 0.1s because I wanted my desktop indicator to switch quickly upon desktop change. However, if you're happy with a bit of a lag, you can always change it to 0.5s or 1s.
Monday 21 September 2009
A cheap little battery widget :)
I liked my last battery widget, but it was a bit resource-hungry, what with all the images and that...So in a previous Conky config, I came up with a quick and easy way to get a battery-widget-like-thing, by using two battery bars, one of which was for a battery that doesn't exist (so it always shows empty).
I used:
to get this:
I used:
${battery_bar 40,165 BAT1}${voffset 10}${battery_bar 20,10 BAT2}
to get this:
 |
| From My Little Desktop Photos |
How to add a little Zen to your life, and why sed is my new favourite command
I've wanted to add quotes to my Conky for a while, and after coming across some discussions on Ubuntu Forums, I had a bit of a brain-child...There had to be a simple way (e.g. without an external script) to grab part of a website and parse it to display on my screen. I did a little research, and it turns out that a combination of curl and sed was what I needed. With a little help from my friends, I ended up with the following command (after TEXT in my Conky):
Basically, it uses curl to look at Tiny Buddha, an inspirational website featuring daily quotes. Then, for an explanation of all the sed commands, thanks to mobilediesel:
The --silent suggestion is thanks to Crinos512.
Anyway, here's the result, a lovely minimal desktop, with just a battery bar (because I don't use any other indicators, not even a system tray these days!) and the time/date.
${alignr}${execpi 3600 curl --silent 'http://tinybuddha.com' | sed '{:q;N;s/\n/ /g;t q}'|grep -o '[^<]*'|sed 's/[[:blank:]]*//;s/[[:blank:]]*$//'|fold -sw 32 | sed -e 's/^/\${alignr}/' -e 's/ $//g'}
Basically, it uses curl to look at Tiny Buddha, an inspirational website featuring daily quotes. Then, for an explanation of all the sed commands, thanks to mobilediesel:
The first sed changes all newlines into spaces so the div tag will be on one line. Then grep looks for the div class="entry" up to the first < character. Then sed again to take out the div tag along with the spaces following it, then the spaces at the end. Then, obviously, through fold so it fits nicely on the desktop.
Since it's looking specifically for the div class="entry" tag, grep should find it even if the site layout changes.
The --silent suggestion is thanks to Crinos512.
Anyway, here's the result, a lovely minimal desktop, with just a battery bar (because I don't use any other indicators, not even a system tray these days!) and the time/date.
 |
| From Screenshots |
Wednesday 16 September 2009
Saturday 5 September 2009
...Mostly to show off :)
Well, there's not really anything innovative in my latest Conky; I was just trying to get something that was easily adaptable to all wallpapers. There are two versions:
...a light version and a dark version.
Both make use of the following:
 |
| From Screenshots |
 |
| From Screenshots |
...a light version and a dark version.
Both make use of the following:
- Santana font
- Sax Mono font
- Token icons (slightly modified in the "light" version)
- Grassy grass wallpaper (sorry, no attribution)
- Hd Multi Colored Lines wallpaper
Monday 31 August 2009
Troubleshooting own_window_type panel...One thing to watch out for!
For those of you who haven't seen my post over at the Conky Blog, my latest creation is a panel-like Conky to sit at the top of my screen and show my processes, date/time and battery state:
As I alluded to in the post, however, you need to make sure that if your panel text is all on one line, your code must ALSO be all on one line, or it will make your Conky too fat!
For example, the code that produced the panel in the screenie is:
...uh, kind of a mess. HOWEVER, if you try to clean it up by putting line breaks in between the text and each of the two $image calls, a la:
...Conky will think that your output should be three lines wide, and will size your window accordingly, and you won't be able to shrink it back to that one line. Believe me, I tried! (And nearly threw my netbook out the window out of frustration before I figured it out.) You will get something that looks like this:
So, in short, it's a little bit of a pain to have to code it all on one line (and more than a little confusing!), but it's definitely worth it.
Special thanks go out to *MrStylo for his battery icons and =mrcool256 for his wallpaper.
 |
| From Screenshots |
 |
| From Screenshots |
As I alluded to in the post, however, you need to make sure that if your panel text is all on one line, your code must ALSO be all on one line, or it will make your Conky too fat!
For example, the code that produced the panel in the screenie is:
TEXT
${goto 5}${voffset 3}CPU ${cpu}%${goto 60}${voffset -1}${font saxMono:size=8}[${top name 1} (${top cpu 1})] [${top name 2} (${top cpu 2})] [${top name 3} (${top cpu 3})]${font}${goto 425}${voffset -1}MEM ${memperc}%${goto 485}${voffset -1}${font saxMono:size=8}[${top_mem name 1} (${top_mem mem 1})] [${top_mem name 2} (${top_mem mem 2})] [${top_mem name 3} (${top_mem mem 3})]${font}${voffset -2}${font Sawasdee Bold:size=10}${alignr 5}${time %a, %d %b %Y %H.%M}${image ~/Pictures/bk_semi_trans_sq.png -s 1024x18 -p 0,0}${if_match ${battery_percent BAT1} <= 14}${image ~/Pictures/Batteries/battery_1.png -s 16x16 -p 845,1}${else}${if_match ${battery_percent BAT1} <= 27}${image ~/Pictures/Batteries/battery_2.png -s 16x16 -p 845,1}${else}${if_match ${battery_percent BAT1} <= 41}${image ~/Pictures/Batteries/battery_3.png -s 16x16 -p 845,1}${else}${if_match ${battery_percent BAT1} <= 54}${image ~/Pictures/Batteries/battery_4.png -s 16x16 -p 845,1}${else}${if_match ${battery_percent BAT1} <= 68}${image ~/Pictures/Batteries/battery_5.png -s 16x16 -p 845,1}${else}${if_match ${battery_percent BAT1} <= 82}${image ~/Pictures/Batteries/battery_6.png -s 16x16 -p 845,1}${else}${if_match ${battery_percent BAT1} < 95}${image ~/Pictures/Batteries/battery_7.png -s 16x16 -p 845,1}${else}${image ~/Pictures/Batteries/battery_full.png -s 16x16 -p 845,1}${endif}${endif}${endif}${endif}${endif}${endif}${endif}
...uh, kind of a mess. HOWEVER, if you try to clean it up by putting line breaks in between the text and each of the two $image calls, a la:
TEXT
${goto 5}${voffset 3}CPU ${cpu}%${goto 60}${voffset -1}${font saxMono:size=8}[${top name 1} (${top cpu 1})] [${top name 2} (${top cpu 2})] [${top name 3} (${top cpu 3})]${font}${goto 425}${voffset -1}MEM ${memperc}%${goto 485}${voffset -1}${font saxMono:size=8}[${top_mem name 1} (${top_mem mem 1})] [${top_mem name 2} (${top_mem mem 2})] [${top_mem name 3} (${top_mem mem 3})]${font}${voffset -2}${font Sawasdee Bold:size=10}${alignr 5}${time %a, %d %b %Y %H.%M}
${image ~/Pictures/bk_semi_trans_sq.png -s 1024x18 -p 0,0}
${if_match ${battery_percent BAT1} <= 14}${image ~/Pictures/Batteries/battery_1.png -s 16x16 -p 845,1}${else}${if_match ${battery_percent BAT1} <= 27}${image ~/Pictures/Batteries/battery_2.png -s 16x16 -p 845,1}${else}${if_match ${battery_percent BAT1} <= 41}${image ~/Pictures/Batteries/battery_3.png -s 16x16 -p 845,1}${else}${if_match ${battery_percent BAT1} <= 54}${image ~/Pictures/Batteries/battery_4.png -s 16x16 -p 845,1}${else}${if_match ${battery_percent BAT1} <= 68}${image ~/Pictures/Batteries/battery_5.png -s 16x16 -p 845,1}${else}${if_match ${battery_percent BAT1} <= 82}${image ~/Pictures/Batteries/battery_6.png -s 16x16 -p 845,1}${else}${if_match ${battery_percent BAT1} < 95}${image ~/Pictures/Batteries/battery_7.png -s 16x16 -p 845,1}${else}${image ~/Pictures/Batteries/battery_full.png -s 16x16 -p 845,1}${endif}${endif}${endif}${endif}${endif}${endif}${endif}
...Conky will think that your output should be three lines wide, and will size your window accordingly, and you won't be able to shrink it back to that one line. Believe me, I tried! (And nearly threw my netbook out the window out of frustration before I figured it out.) You will get something that looks like this:
 |
| From My Little Desktop Photos |
So, in short, it's a little bit of a pain to have to code it all on one line (and more than a little confusing!), but it's definitely worth it.
Special thanks go out to *MrStylo for his battery icons and =mrcool256 for his wallpaper.
Saturday 29 August 2009
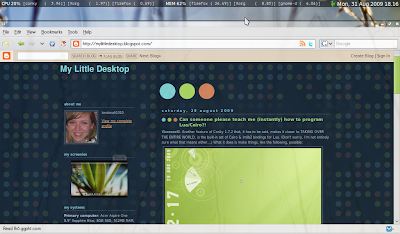
Can someone please teach me (instantly) how to program Lua/Cairo?!
Weeeeeellll. Another feature of Conky 1.7.2 that, it has to be said, makes it closer to TAKING OVER THE ENTIRE WORLD, is the built-in set of Cairo & imlib2 bindings for Lua. (Don't worry, I'm not entirely sure what that means either...) What it does is make things, like the following, possible:
The pies in this little beauty were accomplished with a script by Conky's own main dev, Brenden, using Cairo in a Lua script. The .conkyrc, Brenden's original script, the modified version that got me the screenie above, along with the screenie to guide you, are all packaged together over on my gnome-look.org site.
I only WISH I had this kind of skill!!! (Hence begging for someone to teach me!) But alas, I have no patience, and my brain is already onto the next thing. I must admit, I depend on y'all, my loyal Conky fans, to come up with something brilliant instead...
Happy Conkying!
 |
| From Screenshots |
The pies in this little beauty were accomplished with a script by Conky's own main dev, Brenden, using Cairo in a Lua script. The .conkyrc, Brenden's original script, the modified version that got me the screenie above, along with the screenie to guide you, are all packaged together over on my gnome-look.org site.
I only WISH I had this kind of skill!!! (Hence begging for someone to teach me!) But alas, I have no patience, and my brain is already onto the next thing. I must admit, I depend on y'all, my loyal Conky fans, to come up with something brilliant instead...
Happy Conkying!
Thursday 27 August 2009
Conky is Growing!
I'm living proof that it does happen, kids! Because of the work I've done with Conky, I've been roped into the project to help those lovely chaps expand their web presence. We've just set up an Official Conky Blog, and the Official Conky Forums are on their way!
One of Conky's biggest strengths (besides being generally awesome, that is!) is its fantastic community of users, who keep pushing the boundaries of what you can do with this little program. Our aim is to bring everyone together and create a cross-platform community of support and inspiration! So if you are Conkily-inclined, do head on over. I'll keep you posted.
In the meantime, check out these awesome active threads for cutting-edge Conky technology:
Finally, one of the most exciting Conky websites out there:
If the name wasn't enough to tempt you, then its extensive library of Conky tips and tricks surely will.
One of Conky's biggest strengths (besides being generally awesome, that is!) is its fantastic community of users, who keep pushing the boundaries of what you can do with this little program. Our aim is to bring everyone together and create a cross-platform community of support and inspiration! So if you are Conkily-inclined, do head on over. I'll keep you posted.
In the meantime, check out these awesome active threads for cutting-edge Conky technology:
- The Conky screenshot thread at ubuntuforums.org.
- The Conky help thread at the Crunchbang Forums.
- A similar thread on the Fedora Forums.
- ...at the Mint Forums.
Finally, one of the most exciting Conky websites out there:
If the name wasn't enough to tempt you, then its extensive library of Conky tips and tricks surely will.
One small problem with Conky 1.7.2, through no fault of its own
So Conky 1.7.2 was released on Monday...Among the new features is $desktop (and a couple similar functions), which I was excited about particularly because I thought that if you combined it with the $if_match variable, you might be able to create a different Conky on each workspace!
So I dove straight in and started testing the $desktop variable with
which should output "Desktop 1/4", etc. Uh, except that it didn't. It only gave me "Desktop 1/1". On every desktop.
First thing I did was treble-check the syntax, since I'm notorious for screwing it up (!), but it was right...So what was the problem? I decided to test and see if ${desktop_name} worked, but realised that my desktops didn't have names, and I didn't actually know how to name them!
A quick Google search later, I came up with this bug over at Launchpad. It's an old one, but I still seem to be getting the same problem: whilst running Compiz, all of my desktops are "Desk 1", despite the fact that hovering over the desktop switcher on the panel shows them all having different names. If I turn off desktop effects, no problemo, and the Conky ${desktop} variables work fine.
I guess I'll just have to do without for now, as I care for my eye-candy more than knowing my desktop name!
If any of you clever clogs out there aren't using Compiz and want to have a go with the "different Conky for each desktop" idea, do let me know how you get on!!!
EDIT: As it turns out, the root of the problem with desktop names actually has to do with how Compiz controls your desktops. Compiz actually uses "virtual desktops", all drawn on the same "actual desktop"...The default Compiz settings (if you use desktop cube) are
It would appear that Conky only sees that "one" desktop rather than the four virtual ones. It's unclear at this point whether adjusting some of these values will allow you to use the $desktop variable and still have your lovely spinning cube...
So I dove straight in and started testing the $desktop variable with
Desktop ${desktop}/${desktop_number}
which should output "Desktop 1/4", etc. Uh, except that it didn't. It only gave me "Desktop 1/1". On every desktop.
First thing I did was treble-check the syntax, since I'm notorious for screwing it up (!), but it was right...So what was the problem? I decided to test and see if ${desktop_name} worked, but realised that my desktops didn't have names, and I didn't actually know how to name them!
A quick Google search later, I came up with this bug over at Launchpad. It's an old one, but I still seem to be getting the same problem: whilst running Compiz, all of my desktops are "Desk 1", despite the fact that hovering over the desktop switcher on the panel shows them all having different names. If I turn off desktop effects, no problemo, and the Conky ${desktop} variables work fine.
I guess I'll just have to do without for now, as I care for my eye-candy more than knowing my desktop name!
If any of you clever clogs out there aren't using Compiz and want to have a go with the "different Conky for each desktop" idea, do let me know how you get on!!!
EDIT: As it turns out, the root of the problem with desktop names actually has to do with how Compiz controls your desktops. Compiz actually uses "virtual desktops", all drawn on the same "actual desktop"...The default Compiz settings (if you use desktop cube) are
Horizontal Virtual Size 4
Vertical Virtual Size 1
Number of Desktops 1
It would appear that Conky only sees that "one" desktop rather than the four virtual ones. It's unclear at this point whether adjusting some of these values will allow you to use the $desktop variable and still have your lovely spinning cube...
Tuesday 25 August 2009
More playing...And how to change upper- to lower-case
One of the other things I've wanted to play with for a while is sideways text...Just to broaden the look of Conky that much more!
With the help of Johnny B, I used BlockyCounterClockwise to get the following:
One of the challenges of this was that this particular font reverses the rotation of letters if you type in captials, so when you run the ${execi 60 date} command, the capitals in the output look upside down! I tried setting the "uupercase yes" config variable, but that just made all the text be the opposite rotation from the numbers!
So I had to figure out how to take any single capitals in the date output and change them to lowercase...After a quick Google search, I found:
Not the prettiest method, but it works! To use it, simply pipe the date output into it, like so:
(The cut -c5 here just grabs the first letter of the month name.)
Now all we need are some more interesting sideways fonts :) (No offense of course, to Johnny B.)
With the help of Johnny B, I used BlockyCounterClockwise to get the following:
 |
| From Screenshots |
One of the challenges of this was that this particular font reverses the rotation of letters if you type in captials, so when you run the ${execi 60 date} command, the capitals in the output look upside down! I tried setting the "uupercase yes" config variable, but that just made all the text be the opposite rotation from the numbers!
So I had to figure out how to take any single capitals in the date output and change them to lowercase...After a quick Google search, I found:
sed y/ABCDEFGHIJKLMNOPQRSTUVWXYZ/abcdefghijklmnopqrstuvwxyz
Not the prettiest method, but it works! To use it, simply pipe the date output into it, like so:
${execi 60 date | cut -c5 | sed y/ABCDEFGHIJKLMNOPQRSTUVWXYZ/abcdefghijklmnopqrstuvwxyz}
(The cut -c5 here just grabs the first letter of the month name.)
Now all we need are some more interesting sideways fonts :) (No offense of course, to Johnny B.)
Monday 24 August 2009
Playing with Individual Character Placement
Thanks to the guys over at ubuntuforums.org, I found out that I can pipe the output from the 'date' command into cut in order to get control over individual characters in the date or time. It gives you that much more flexibility if you want to do some fancy-schmancy integration into your desktop.
A word of warning, however: it is a SERIOUS pain to code, very manual, and you must use a monospace font or else the spacing between letters won't look right. Anyway, an example first, and then the code for it:
A word of warning, however: it is a SERIOUS pain to code, very manual, and you must use a monospace font or else the spacing between letters won't look right. Anyway, an example first, and then the code for it:
 |
| From Screenshots |
${voffset 190}${font saxMono:size=150}${execi 60 date +%a | cut -c1}${font}
${voffset -120}${goto 110}${font saxMono:size=110}${execi 60 date +%a | cut -c2}${font}
${voffset -122}${goto 190}${font saxMono:size=105}${execi 60 date +%a | cut -c3}${font}
${voffset -115}${goto 268}${font saxMono:size=98}${font}
${voffset -113}${goto 340}${font saxMono:size=92}${execi 60 date +%d | cut -c1}${font}
${voffset -110}${goto 408}${font saxMono:size=88}${execi 60 date +%d | cut -c2}${font}
${voffset -108}${goto 472}${font saxMono:size=82}${font}
${voffset -105}${goto 535}${font saxMono:size=76}${execi 60 date +%b | cut -c1}${font}
${voffset -98}${goto 595}${font saxMono:size=70}${execi 60 date +%b | cut -c2}${font}
${voffset -90}${goto 650}${font saxMono:size=62}${execi 60 date +%b | cut -c3}${font}
${voffset -85}${goto 700}${font saxMono:size=52}${font}
${voffset -88}${goto 740}${font saxMono:size=62}${execi 60 date +%Y | cut -c1}${font}
${voffset -88}${goto 785}${font saxMono:size=65}${execi 60 date +%Y | cut -c2}${font}
${voffset -90}${goto 835}${font saxMono:size=68}${execi 60 date +%Y | cut -c3}${font}
${voffset -94}${goto 885}${font saxMono:size=75}${execi 60 date +%Y | cut -c4}${font}
${voffset 25}${goto 720}${font saxMono:size=85}${execi 60 date +%R | cut -c1}${font}
${voffset -105}${goto 785}${font saxMono:size=92}${execi 60 date +%R | cut -c2}${font}
${voffset -120}${goto 850}${font saxMono:size=110}${execi 60 date +%R | cut -c4}${font}
${voffset -125}${goto 920}${font saxMono:size=125}${execi 60 date +%R | cut -c5}${font}
Tuesday 18 August 2009
How to make Conky play nicely with KDE 4.3
Up till recently, I stuck fervently to Gnome DE, since it was the default on Ubuntu 8.10. After I upgraded to Ubuntu 9.04, I decided to give Kubuntu a whirl (the current version of Kubuntu is KDE 4.2), but I could barely get it to run for an hour without a total system freeze, so I ditched that idea!
When KDE 4.3 came out, I was willing to give it another try, especially as a number of folks on the August Screenie Thread at the Ubuntu Forums said that it was much faster and better all around than 4.2...Well, they didn't let me down! However, this is not an I LOVE KDE thread...
Since I depend heavily on Conky to keep my system running, I needed KDE and Conky to play nicely together or I wouldn't be able to use it full-time. Since I already used a startup script to run Conky, I just let that run in KDE and, uh, got this:
After a bit of investigation (thank you, Internet), I discovered that the reason was twofold: first, Conky uses pseudo-transparency instead of ACTUAL transparency; second, KDE doesn't draw wallpaper to the root window, only to the plasma desktop. To clarify these points:
1) Pseudo-transparency in Conky means that it peeks at the root desktop and draws it as the background of the Conky window.
2) KDE draws wallpapers to the plasma desktop only, which is the lowest window on top of the root window. Instead, the root window is empty, which shows up in Conky as black. Yuck. Well, unless you really like black.
Anyway, after much tinkering, I have gotten my desktop to look like this:
Yay!
To get your Conky and KDE to cooperate, rather than pugilate (is that a word?):
Use feh to draw the current background to the root window.
Feh is a lightweight image viewer, but that's really irrelevant, since it does what we need it to here! To install it (if you haven't already), use:
I will assume for the moment that you are already using a startup script to launch your Conky from the startup programs menu...Mine initially looked like this:
I wanted to run feh just once before Conky started up, so that the root window was already drawn before Conky tried to peek at it, so I modified my conky_start.sh to be:
A couple of notes...The "--bg-scale" option assumes that you use "scale" to draw your wallpaper (as opposed to center, tile, etc.). If you do use another method, you can also use --bg-tile --bg-center, etc. instead. The feh looks at the plasma-desktop-appletsrc file to see what wallpaper is currently being used, and draws that to the background.
And as with all tweaks, there are a couple of pitfalls. First, because we're running feh just once before Conky starts, if you change backgrounds during your session, it won't change in Conky, a la this:
I would recommend doing a
and restarting the plasma-desktop to redraw your Conky (I just log out and back in).
Another pitfall is that if you use the stock KDE wallpapers, this method may not work. That's because the "wallpaper=" field in plasma-desktop-appletsrc in this case points to a directory, not a file, and somehow KDE figures out which of several resolutions to use. Feh can't figure that out, so it draws nothing, and you're back to the black background. The workaround is to find the wallpaper you want, copy it into, say ~/Pictures/Wallpapers/ and select it from there with the Desktop Settings dialog.
Ensure that your Conky window doesn't overlap any plasmoids.
Regardless of whether you use own_window_hints below (see my previous post), plasmoids will always draw still lower. So if your Conky window overlaps, you'll get something like this:
(Keep in mind that I use Compiz to make my Conky semi-transparent, as in another previous post...)
Enjoy KDE!!!
Well, that's pretty self-explanatory...!
When KDE 4.3 came out, I was willing to give it another try, especially as a number of folks on the August Screenie Thread at the Ubuntu Forums said that it was much faster and better all around than 4.2...Well, they didn't let me down! However, this is not an I LOVE KDE thread...
Since I depend heavily on Conky to keep my system running, I needed KDE and Conky to play nicely together or I wouldn't be able to use it full-time. Since I already used a startup script to run Conky, I just let that run in KDE and, uh, got this:
 |
| From My Little Desktop Photos |
After a bit of investigation (thank you, Internet), I discovered that the reason was twofold: first, Conky uses pseudo-transparency instead of ACTUAL transparency; second, KDE doesn't draw wallpaper to the root window, only to the plasma desktop. To clarify these points:
1) Pseudo-transparency in Conky means that it peeks at the root desktop and draws it as the background of the Conky window.
2) KDE draws wallpapers to the plasma desktop only, which is the lowest window on top of the root window. Instead, the root window is empty, which shows up in Conky as black. Yuck. Well, unless you really like black.
Anyway, after much tinkering, I have gotten my desktop to look like this:
| From My Little Desktop Photos |
Yay!
To get your Conky and KDE to cooperate, rather than pugilate (is that a word?):
Use feh to draw the current background to the root window.
Feh is a lightweight image viewer, but that's really irrelevant, since it does what we need it to here! To install it (if you haven't already), use:
sudo apt-get install feh
I will assume for the moment that you are already using a startup script to launch your Conky from the startup programs menu...Mine initially looked like this:
#!/bin/bash
sleep 15
conky &
I wanted to run feh just once before Conky started up, so that the root window was already drawn before Conky tried to peek at it, so I modified my conky_start.sh to be:
#! /bin/bash
feh --bg-scale `grep 'wallpaper=' ~/.kde/share/config/plasma-desktop-appletsrc | tail --bytes=+11`
sleep 15
conky -&
A couple of notes...The "--bg-scale" option assumes that you use "scale" to draw your wallpaper (as opposed to center, tile, etc.). If you do use another method, you can also use --bg-tile --bg-center, etc. instead. The feh looks at the plasma-desktop-appletsrc file to see what wallpaper is currently being used, and draws that to the background.
And as with all tweaks, there are a couple of pitfalls. First, because we're running feh just once before Conky starts, if you change backgrounds during your session, it won't change in Conky, a la this:
 |
| From My Little Desktop Photos |
I would recommend doing a
killall conky
~/scripts/conky_start.sh
and restarting the plasma-desktop to redraw your Conky (I just log out and back in).
Another pitfall is that if you use the stock KDE wallpapers, this method may not work. That's because the "wallpaper=" field in plasma-desktop-appletsrc in this case points to a directory, not a file, and somehow KDE figures out which of several resolutions to use. Feh can't figure that out, so it draws nothing, and you're back to the black background. The workaround is to find the wallpaper you want, copy it into, say ~/Pictures/Wallpapers/ and select it from there with the Desktop Settings dialog.
Ensure that your Conky window doesn't overlap any plasmoids.
Regardless of whether you use own_window_hints below (see my previous post), plasmoids will always draw still lower. So if your Conky window overlaps, you'll get something like this:
 |
| From My Little Desktop Photos |
(Keep in mind that I use Compiz to make my Conky semi-transparent, as in another previous post...)
Enjoy KDE!!!
Well, that's pretty self-explanatory...!
Friday 14 August 2009
Who needs screenlets when you can have Conky?!
I've just finished working on my latest Conky!
There are two main features...
1) Use a combination of Conky and Compiz to get nifty transparency effects
I have my windows set to 95% transparency in Compiz, which never applied to Conky until recently when I started using the "own_window yes" option (see a couple posts previous). Then it occurred to me that I could use it to create a nifty effect! Here's I did to get the top text transparent whilst keeping the bottom text opaque:
+ Run two Conkys. You might not notice, but the top and bottom of this screenie are actually running two different Conkys simultaneously.
+ Specify the class of the Conky that will be semi-transparent, by using something like "own_window_class Conky-semi" (I used Conky-50 because I'd intended to use 50%, but 75% looks better!).
+ In Compiz Config Settings Manager, go to Opacity, Brightness & Saturation and add a new window type, "class=Conky-semi" and set the transparency to something like 75%:
+ Et voila!
2) Create a battery widget
There are a number of great sets of images you can download as icons for various dock programs; you can use one of these suites, combined with Conky's ${image} function and a big nested ${if_match ${battery_percent}} statement to create a battery widget, like so:
Not too pretty, I'll grant you, but it does the trick! Just make sure you've got all the ${endif}s you need :)
And yes, before you ask, I will package this one, and the battery widget separately, once I have permission from the artist to do so. The battery widget icons are by *MrStylo; please click on his DeviantArt account for more info.
-----
One final little nugget: a really nifty, pretty lightweight way to get a nice semi-transparent background for your Conky is to make a small semi-transparent square (I used a 50x50px square I made in GIMP), and stretch it to the size you need using the -s option in the ${image} variable.
Happy Conkying!
 |
| From Screenshots |
There are two main features...
1) Use a combination of Conky and Compiz to get nifty transparency effects
I have my windows set to 95% transparency in Compiz, which never applied to Conky until recently when I started using the "own_window yes" option (see a couple posts previous). Then it occurred to me that I could use it to create a nifty effect! Here's I did to get the top text transparent whilst keeping the bottom text opaque:
+ Run two Conkys. You might not notice, but the top and bottom of this screenie are actually running two different Conkys simultaneously.
+ Specify the class of the Conky that will be semi-transparent, by using something like "own_window_class Conky-semi" (I used Conky-50 because I'd intended to use 50%, but 75% looks better!).
+ In Compiz Config Settings Manager, go to Opacity, Brightness & Saturation and add a new window type, "class=Conky-semi" and set the transparency to something like 75%:
 |
| From My Little Desktop Photos |
+ Et voila!
2) Create a battery widget
There are a number of great sets of images you can download as icons for various dock programs; you can use one of these suites, combined with Conky's ${image} function and a big nested ${if_match ${battery_percent}} statement to create a battery widget, like so:
${if_match ${battery_percent BAT1} <= 14}${image /home/alison/Pictures/Batteries/battery_1.png -s 75x100 -p 0,20}${else}${if_match ${battery_percent BAT1} <= 27}${image /home/alison/Pictures/Batteries/battery_2.png -s 75x100 -p 0,20}${else}${if_match ${battery_percent BAT1} <= 41}${image /home/alison/Pictures/Batteries/battery_3.png -s 75x100 -p 0,20}${else}${if_match ${battery_percent BAT1} <= 54}${image /home/alison/Pictures/Batteries/battery_4.png -s 75x100 -p 0,20}${else}${if_match ${battery_percent BAT1} <= 68}${image /home/alison/Pictures/Batteries/battery_5.png -s 75x100 -p 0,20}${else}${if_match ${battery_percent BAT1} <= 82}${image /home/alison/Pictures/Batteries/battery_6.png -s 75x100 -p 0,20}${else}${if_match ${battery_percent BAT1} < 95}${image /home/alison/Pictures/Batteries/battery_7.png -s 75x100 -p 0,20}${else}${image /home/alison/Pictures/Batteries/battery_full.png -s 75x100 -p 0,20}${endif}${endif}${endif}${endif}${endif}${endif}${endif}
Not too pretty, I'll grant you, but it does the trick! Just make sure you've got all the ${endif}s you need :)
And yes, before you ask, I will package this one, and the battery widget separately, once I have permission from the artist to do so. The battery widget icons are by *MrStylo; please click on his DeviantArt account for more info.
-----
One final little nugget: a really nifty, pretty lightweight way to get a nice semi-transparent background for your Conky is to make a small semi-transparent square (I used a 50x50px square I made in GIMP), and stretch it to the size you need using the -s option in the ${image} variable.
Happy Conkying!
Thursday 13 August 2009
It's not just Linux!
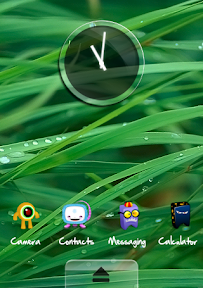
Yes, desktop customisation is an actual ADDICTION. Wherever there's a desktop-like interface, I can't help but customise it!!! An example: my T-Mobile G1:
My main screen:
My left screen, with calendar and photo frame widgets:
My right screen, with my most common apps, Twidget Lite and Google Voice Search:
I use Open Home (available for $4.99 from the Android Market), with the Aero skin and Creature Pack icons, all available for free on the Market.
My main screen:
 |
| From Screenshots |
My left screen, with calendar and photo frame widgets:
 |
| From Screenshots |
My right screen, with my most common apps, Twidget Lite and Google Voice Search:
 |
| From Screenshots |
I use Open Home (available for $4.99 from the Android Market), with the Aero skin and Creature Pack icons, all available for free on the Market.
Sunday 9 August 2009
Don'cha wish your desktop was hot like mine?
...Well now it can be!
I've started packaging my Conkys and uploading them over on my account at gnome-look.org. So what are you waiting for, go download them and have a go! Okay, so I've only put up two so far, but I'll put up more as I go along.
Happy conky-ing!
I've started packaging my Conkys and uploading them over on my account at gnome-look.org. So what are you waiting for, go download them and have a go! Okay, so I've only put up two so far, but I'll put up more as I go along.
Happy conky-ing!
Friday 7 August 2009
Fun with the new Conky 1.7.1.1
So, I've just downloaded the new Conky 1.7.1.1, primarily because everyone else seemed to be using it, and I wanted to keep up with the Joneses...Well, primarily to keep up with narf41 over at ubuntuforums.org. Moving on.
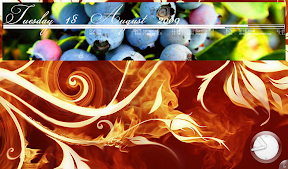
I built a new Conky around a wallpaper I found recently. The concept was that the Conky would interact with the desktop like a notification system...Hard to explain, so I'll just show you some screenies:
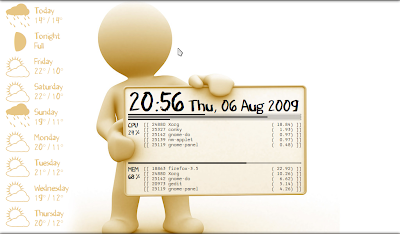
This is the "normal" mode, where the announcement board has all the basic info, such as the battery and file system bars and the CPU and memory usage.
Then, when the wireless is turned on:
And when Rhythmbox is playing:
This is my favourite bit, actually, as in addition to the ${image} function, I've also discovered the ${scroll} function, which keeps the artist & track names inside the speech bubble by scrolling them.
You can download the entire package, with graphics and config files from my gnome-look.org profile.
(Please note that I can't take any credit for the artwork as the only part of this I did was the .conkyrc and the conkyForecast.template! As many of the credits I could find are contained in the README.txt file.)
I built a new Conky around a wallpaper I found recently. The concept was that the Conky would interact with the desktop like a notification system...Hard to explain, so I'll just show you some screenies:
 |
| From Screenshots |
This is the "normal" mode, where the announcement board has all the basic info, such as the battery and file system bars and the CPU and memory usage.
Then, when the wireless is turned on:
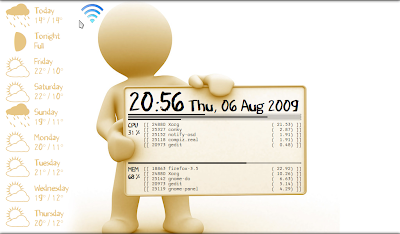 |
| From Screenshots |
And when Rhythmbox is playing:
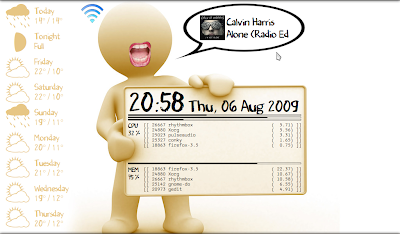 |
| From Screenshots |
This is my favourite bit, actually, as in addition to the ${image} function, I've also discovered the ${scroll} function, which keeps the artist & track names inside the speech bubble by scrolling them.
You can download the entire package, with graphics and config files from my gnome-look.org profile.
(Please note that I can't take any credit for the artwork as the only part of this I did was the .conkyrc and the conkyForecast.template! As many of the credits I could find are contained in the README.txt file.)
Tuesday 4 August 2009
So what *are* all those window options in Conky, anyway???
At the risk of sounding completely ignorant, I never really did get why everyone seems to use "own_window yes" in their Conky config settings...Until now! So I'm going to enlighten y'all, with a couple examples.
I have always, in my Conkys, used "own_window no" because it was simpler. I didn't have to worry about setting the hints correctly or transparency...It was just one line.
However, I've just now upgraded to Conky 1.7.1.1 as per the DEB file here. And when I used my normal Conky with "own_window no", precisely nothing happened.
Yikes!
After consulting the official Conky documentation for config settings, I decided to try:
as it seemed the simplest method.
And that gave me this:
Uh, still not right.
So then I tried:
but even that wasn't right because it then gave me shadows around my desktop, thanks to Compiz.
Turns out, though, there is an option in Compiz Config Settings Manager to let you select the windows to decorate or to shadow. If you specify the class of your Conky window as "Conky", you can then exclude that from shadows, by changing it to "any& !(class=Conky)", as below:
So, to summarise, to get the same effect as using "own_window no", you have to use the following in your Conky config:
and add "any& !(class=Conky)" to the Shadow windows option in the Window Decorations screen of Compiz Config Settings Manager.
So here's my final screenie:
I have always, in my Conkys, used "own_window no" because it was simpler. I didn't have to worry about setting the hints correctly or transparency...It was just one line.
However, I've just now upgraded to Conky 1.7.1.1 as per the DEB file here. And when I used my normal Conky with "own_window no", precisely nothing happened.
Yikes!
After consulting the official Conky documentation for config settings, I decided to try:
own_window yes
own_window_transparent yes
own_window_type desktop
as it seemed the simplest method.
And that gave me this:
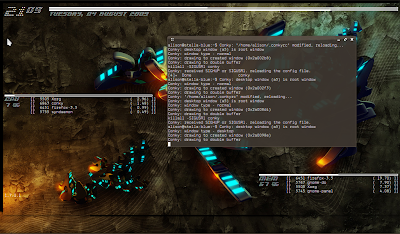 |
| From My Little Desktop Photos |
Uh, still not right.
So then I tried:
own_window yes
own_window_transparent yes
own_window_hints undecorate,sticky,skip_taskbar,skip_pager,below
but even that wasn't right because it then gave me shadows around my desktop, thanks to Compiz.
 |
| From My Little Desktop Photos |
Turns out, though, there is an option in Compiz Config Settings Manager to let you select the windows to decorate or to shadow. If you specify the class of your Conky window as "Conky", you can then exclude that from shadows, by changing it to "any& !(class=Conky)", as below:
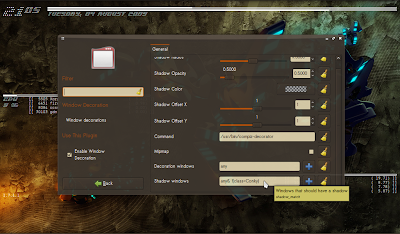 |
| From My Little Desktop Photos |
So, to summarise, to get the same effect as using "own_window no", you have to use the following in your Conky config:
own_window yes
own_window transparent
own_window_class Conky
own_window_hints undecorate,sticky,skip_taskbar,skip_pager,below
and add "any& !(class=Conky)" to the Shadow windows option in the Window Decorations screen of Compiz Config Settings Manager.
So here's my final screenie:
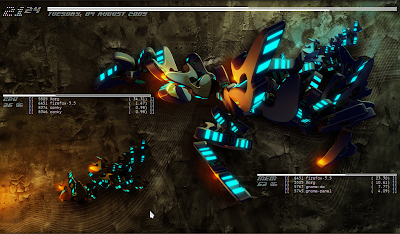 |
| From My Little Desktop Photos |
Monday 27 July 2009
TIP: Set your panels to hide to 0 px
I bet you didn't realise that I haven't actually gotten rid of my panels in Gnome, right? I had toyed with the idea, but in the end, I decided to keep both the top and bottom panels because of their functionality, most notably:
That said, most of the time I don't want my panels to be there at all, and the default 3px hide is kinda rubbish. To get the panels to hide to 0px (although I swear it's actually 1px because I can still see a little, tiny strip on the top and bottom), you need to delve into the (awesome!) gconf-editor, which you can run using Alt-F2 and typing "gconf-editor".
It's a bit like regedit in Windows, but easier to use.
Anyway, navigate (in the left panel) to / -> apps -> panel -> toplevels. Under toplevels, you may have panel_0 & panel_1 (like I have), or it will be something similar. It is these that you want to edit...Click on panel_0, then find the field auto_hide_size. Double-click to make it editable, then type 0. That's it! Repeat for panel_1 if applicable.
You will need to restart your panels for it to take effect; I usually just log out and log back in.
- I like to occasionally browse through my menus, just to see what's there!
- I haven't quite gotten the hang of using Gnome-Do to open Nautilus to where I want.
- I like having the systray open so I get nice little notifications for (e.g.) the network connecting, battery low, a change in volume or brightness, etc.
- I sometimes forget what windows I have open (and they are quite often on different desktops), so I use the bottom hidden bar as a taskbar, and also to show when I have external devices mounted.
That said, most of the time I don't want my panels to be there at all, and the default 3px hide is kinda rubbish. To get the panels to hide to 0px (although I swear it's actually 1px because I can still see a little, tiny strip on the top and bottom), you need to delve into the (awesome!) gconf-editor, which you can run using Alt-F2 and typing "gconf-editor".
 |
| From My Little Desktop Photos |
It's a bit like regedit in Windows, but easier to use.
Anyway, navigate (in the left panel) to / -> apps -> panel -> toplevels. Under toplevels, you may have panel_0 & panel_1 (like I have), or it will be something similar. It is these that you want to edit...Click on panel_0, then find the field auto_hide_size. Double-click to make it editable, then type 0. That's it! Repeat for panel_1 if applicable.
 |
| From My Little Desktop Photos |
You will need to restart your panels for it to take effect; I usually just log out and log back in.
Wednesday 22 July 2009
New Screenie, Conky etc.!
Okay, I settled on a new desktop...I hope you like!
More details available on the Ubuntu Forums Conky Thread.
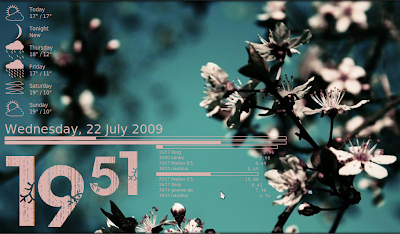 |
| From Screenshots |
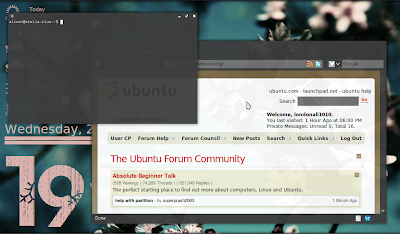 |
| From Screenshots |
More details available on the Ubuntu Forums Conky Thread.
Tuesday 21 July 2009
Mucking Around
I found this fantasic wallpaper on 4scrape and just had to try it out...It's just begging for a Conky!
Anyway, I had a go, just for a trial...It's not really my style so my heart isn't quite in it, but I'd love to see someone else have a go!
Anyway, I had a go, just for a trial...It's not really my style so my heart isn't quite in it, but I'd love to see someone else have a go!
 |
| From Screenshots |
Thursday 16 July 2009
TIP: Be Savvy About the Order of Things in Conky!
Here's a quick shot of my current desktop:
 |
| From Screenshots |
A brief summary: I'm running Ubuntu with Gnome; I actually use a top and bottom panel, both auto-hidden to 0px (I'll share that tip in another post), my system information is drawn to the desktop using Conky, and I use Gnome-Do as a launcher, so I don't need a menu or dock bar.
In my Conky, I use a combination of ${goto}, ${offset} and ${voffset} to cover the placement of everything, including ConkyForecast, which finds me the weather. I found that you have to be really careful of how you call the various pieces of the code, however, to manage drawing things in the right order! For instance, it isn't obvious, but in this example, I draw the CPU/memory bars and their associated processes first, under the beach hut, then the battery and hard drive bars right at the bottom, then the clock and date, and finally the ConkyForecast. Normally you'd think you'd want to draw it from the top down, to minimise jumping all over the screen, but drawing it this way does a couple of things:
- It ensures that when my huge funky font splashes out over a large part of the screen, it draws on top of the CPU/memory bars, rather than below it, and
- When starting up from OFF, ConkyForecast can't query the weather until you're connected to the internet; if you put ConkyForecast first, it doesn't draw anything, and if you've used ${offset} or ${voffset} relative to its placement, the rest of your information will be misaligned.
Happy tweaking!
A Brief Introduction
Okay, I've finally had to admit to myself that I have two great crafty loves: textiles (incl. knitting, crocheting and quilting) and desktop customisation. Now, you can stop yourself right there, because my hubby has already informed me that I am a massive dweeb. Well...Nevermind. Anyway, I already have a blog devoted to my other crafty work (http://noisypitta.blogspot.com), so I have started blog #2, for everything related to desktop customisation, on the various OS platforms I use.
This blog is partially to share my tips and tricks, but mostly for me to have a record of the "artwork" that I produce. For your info, I use several different OS-es: at work, I use WinXP (which is pretty much "locked down" due to our rather strict IT protocols), Ubuntu at home (the latest release, natch) and Google Android on my T-Mobile G1. I am pretty obsessed with the way things look, being such a visual person, and I tweak pretty much non-stop because I'm always after that perfect, intuitive system...
Please feel free to leave comments/critiques here, or you can find me on the Ubuntu forums (londonali1010) or on gnome-look.org (londonali1010). I should also mention that for new screenies, I will be sure to credit other artwork where I can, but for old screenies, I don't have that info to hand. However, I will be happy to have a look for you, if you find a particular wallpaper or font you like!
Subscribe to:
Posts (Atom)